This section will record my first attempts at creating my own 3D game using Unity Engine and C#. This game will be heavily based on my previous 2D Python project.
Back from hiatus:
After nearly 4 months since my last developments on this game, I have finally decided that it's time to continue ou on my game devving journey. After a month of job-searching and nearly three months
of settling into my new career, I've found a routine and in which I can carry on this self-driven project.
Small work:
To settle back into the project, I've been looking over my existing work, understanding what has been developed and evaluating what could be improved in terms of performanec optimisation and maintainablity.
The next few sessions will consist of possible refactoring and small adjustments to the graphics and game logic.
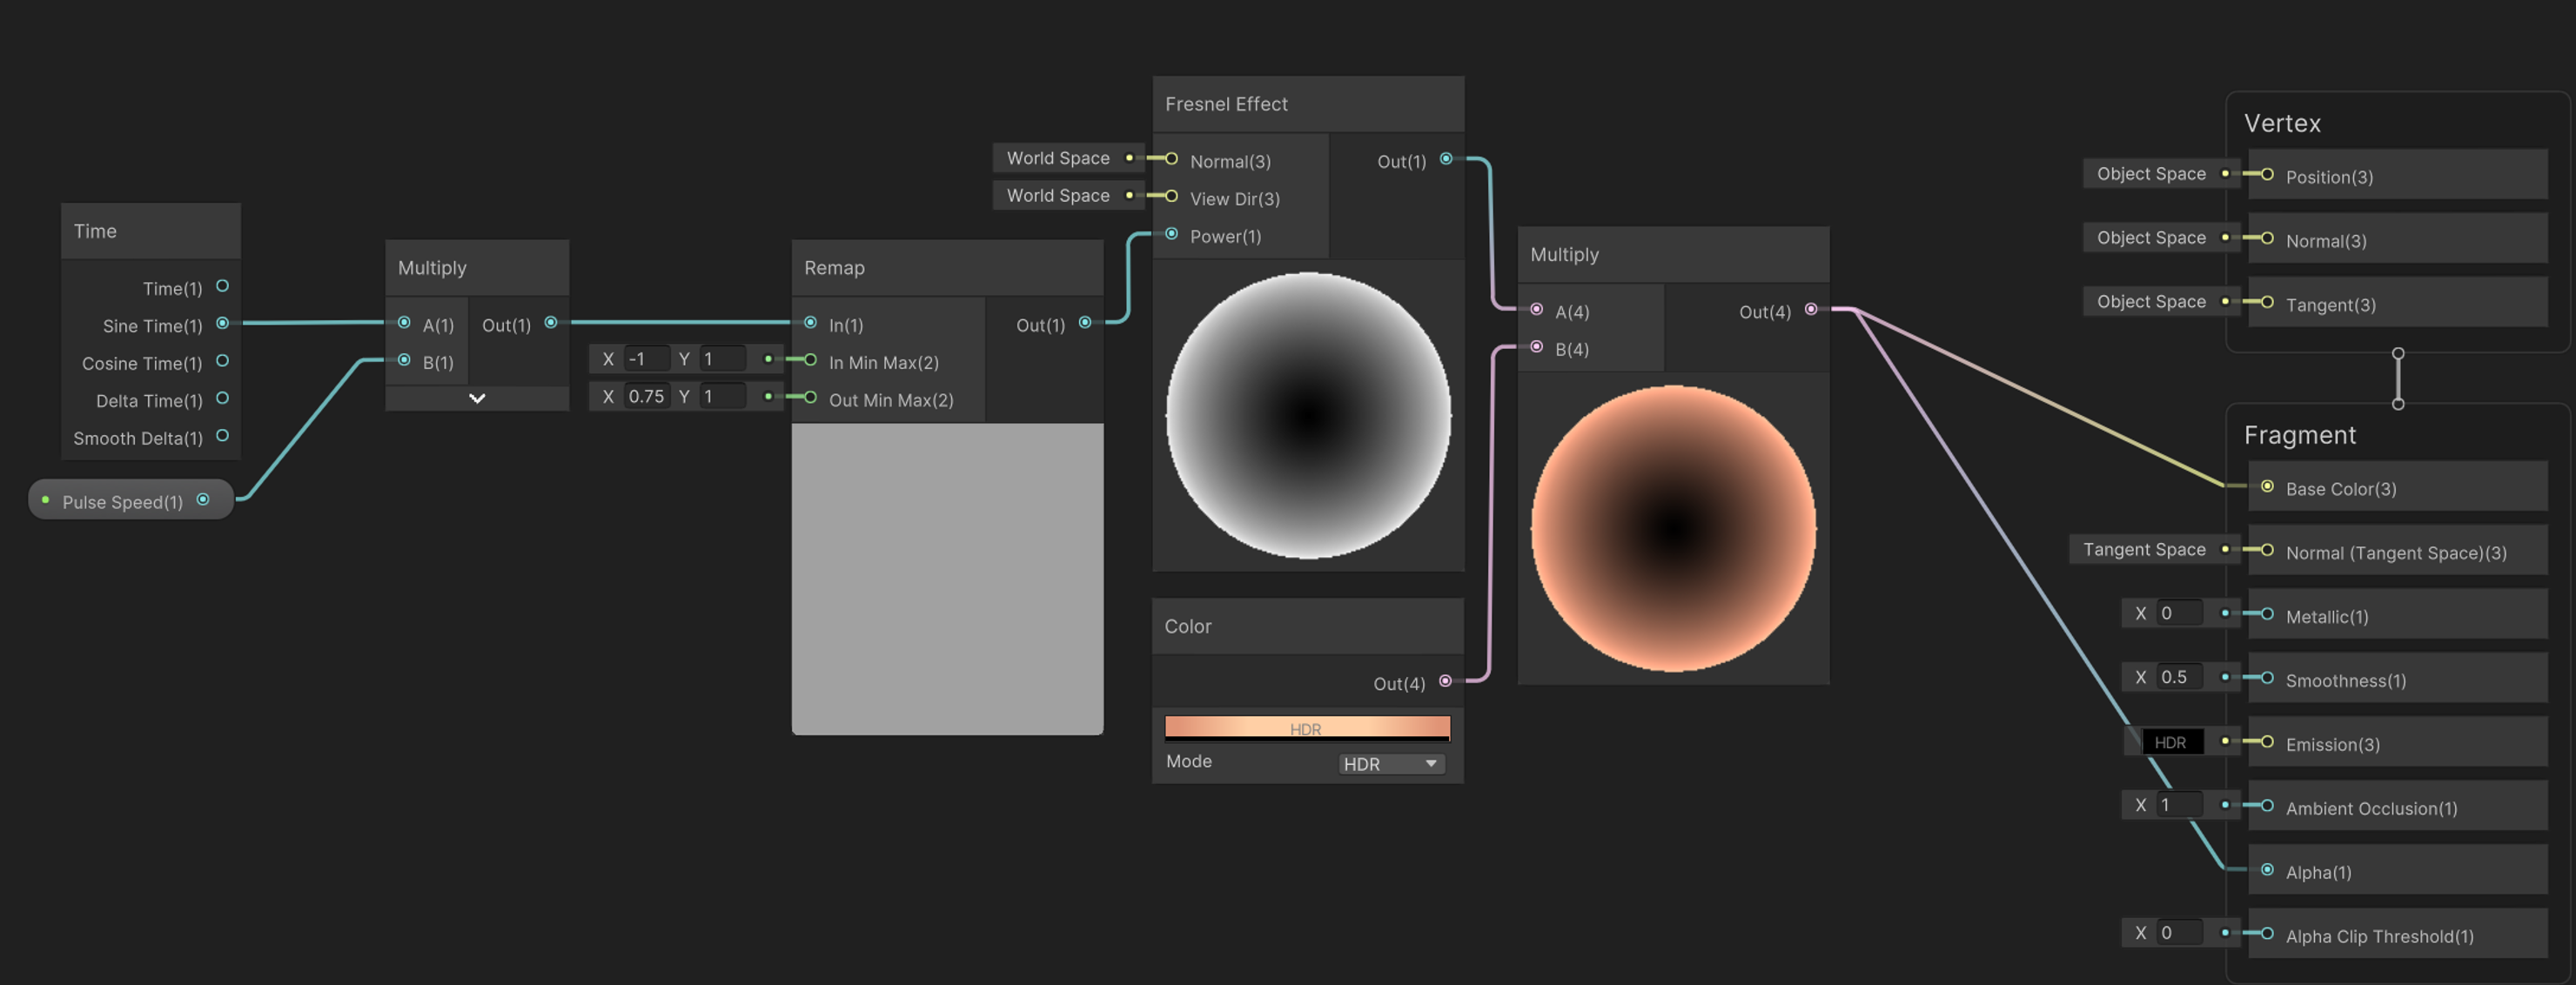
The player's cursor now turns into a target in Unit Selection mode when one or more units are selected.
- - - - -
Game Balancing and Audio
Gameplay with audio.
31/10/2022
Game Balancing:
After a brief hiatus game deving is now back on track. I first continued where I left off, adjusting the attribute values for each building, unit, enemy, and turret. This included calculating the
average amount of damage inflicted by units and turrets based on the attack speed and number of projectiles created per attack. I decided to remove the vehicle bay which produces the tanks from the
game, as they don't necessarily provide any added value to the game. This can be re-introduced again at some point, if it is suitable to enhance further development at some point in the future.
Implementing Audio:
Audio is now added to the game. Sound is separated into the background music and sound effects. The volume can initially be adjusted within the 'Options Menu' from the main menu, and can be
subsequently changed within the game's pause menu. The volume for most of the sound effects are dependent on the sources' distances in relation to the avatar. This prevents the audio from becoming
too saturated with sound effects, especially in later stages of the game. Implementing the audio sources ranged from playing them through pre-existing conditions in script components, or playing
them automatically as soon as the game object is instantiated. The former is used as much as possible, such as building placement and the emission of projectiles, as this minimises the number of
actions required by the scripts, improving the game's performance, albeit by a very minute margin.
Fracturing Units:
All units (and later buildings) are given fractured variants created in Blender. These are converted into explosion effects which are instantiated when the corresponding units die. Different explosion visual
effects were also created depending on the colour (orange, green, red, blue, and purple) and size (small, medium, large).
Artifact Generators:
New buildings were created to generate artifacts. These interactable buildings are able to produce all types of artifacts, but cost a fee of the same type of artifact in order to begin the production process.
The building can switch between production types, but must also incur the same costs.
Edited Guided Projectiles:
Guided projectiles would automatically disappear if their target was destroyed before impact. These projectiles now store the last known position vector of their targets, and explode when they reach this
position. This makes made the projectiles less conspicuous when trying to despawn in the current absence of a target.
Top Priorities:
Think of a way to graphically despawn the fractured debris.
Implement the fracturing process for the buildings.
Production Queues, Tractor Beams, and Cloaking Ships
Ships automatically activating cloaking field at half-health.
30/09/2022
Production Queues:
This feature required restructuring the production codes for all unit production buildings. Each production building now contains a list which abides by the sequence of which the units are selected in the production menu. String tokens are used for the
contents of this list, used to identify which unit needs to be produced. The methods provided for the 'OnClick()' functions for each button supply the string tokens that are used to activate the build coroutines which spawn the units. A Boolean is
used to avoid the overlap of coroutines, and the iterative process is guarded by a Boolean to prevent the 'Update()' function from processing the multiple 'if' statements required for build queue, if nothing is being built.
Cursor Renders:
There are now three different cursor renders in the game. The default cursor changes to a target during unit selection mode when overlapping an enemy unit. The cursor also changes when in demolition mode.
Unlockable Tractor Beam:
A tractor beam can be unlocked and upgraded from the research menu. It is used to collect droppables including artifacts. When the tractor beam is upgraded, its duration and range are increased.
Cloaking Ships:
New units are introduced cloaking capabilities which can be activated for a limited period of time. This ability can be prompted depending on health or movement conditions, depending on the unit. Producible units such as these will require artifacts
to build.
Demolition Mode:
Buildings can now be deleted from the map. This feature makes use of their existing 'OnDestroy()' methods which return resources such as power consumption and workers. The demolition mode can be accessed from within 'Construction Mode', by either
pressing the respective button, or the hotkey [B]. The demolition mode can be exited by repeating either of the same actions, or simply by right-clicking. The demolition panel gives the option to either delete the building, or cancel
the selection.
Bug Fixes:
Problem: Any unit production menus currently open will overlap the research menu.
Solution: Production menus will be automatically closed when the game is paused. This applies to when the research menu is active.
Problem: Demolition panel does not update update building details when consecutively clicking on different buildings.
Solution: The Boolean governing when building details are set was made public and static, and is reset to 'false' each time a building is clicked to prompt the update.
Problem: When demolition mode is re-entered, the previously-selected building would still be displayed in the demolition panel.
Solution: The stored building to delete is reset to 'null' when exiting 'Construction Mode'. This resets the panel to its default inactive state when re-entering demolition mode.
Problem: Interacting with the demolition panel when over a building in the game's scene causes the demolition building details to be replaced with the underlying building.
Solution: Raycasting was added by using the previously-made 'DetectProductionMenu' component and a 2D box collider to the demolition panel.
Problem: The previous demolition panel fix caused clashes with the unit production panels.
Solution: A 'GraphicsRaycaster' component was added to the demolition panel.
Problem: Cursor does not automatically reert back to its default cursor render when transitioning back to the main menu.
Solution: 'Unit Selection Mode' and 'Construction Mode' are disabled jsut before returning to the main menu. Since the cursor depends on the corresponding public static variables, the cursor is prompted to revert back to its default
state.
What's Next:
Add more game units. Explore adding more unit secondary abilities. Start designing a game tutorial and develop the player UI.
Build queue in droid port.
- - - - -
Guided Projectiles and Repair Stations
Guided enemy projectiles and deployable repair station.
23/09/2022
Enemy Identification:
Within Unit Selection mode, the player can hover over an enemy and a panel will be displayed, showing the enemy type, its image, and its current health.
Player UI Redesign:
Much of the UI was redesigned, including the player's HUD, construction menus, research menu, and unit production menus. All icons were redesigned in Blender.
Ability Cooldown Times:
Cooldown times were imposed on player abilities. These times were added on to the existing lifetimes to limit the excessive use of these abilities.
Guided Projectiles:
Friendly and enemy units can now fire guided projectiles that follow their target, as well as the normal projectiles. This will be implemented sparingly and with caution, as it could cause the gameplay to be unbalanced.
Deployable Repair Station:
This new ability allows the player's avatar to deploy a repair station anywhere in the map. The guided heal projectiles will also heal any friendly unit or building within range. If the station becomes displaced, it will slowly return back to its
position of deployment. The station is also defenceless, therefore a temporary force field is activated when the station is attacked.
The Usual Bug Fixes
What's Next:
Add more game units (outposts and space stations) and look into building upgrades. Explore adding unit secondary abilities. Start designing a game tutorial and develop the player UI.
Updated player interface.
- - - - -
Unit Selection
Selecting units with marquee and allocating targets.
18/09/2022
Unit Selection:
A new manual unit selection mode was added, enhancing the RTS aspect of the game. The references listed below were heavily implemented to employ this feature, with some fundamental changes to become compatible with the existing game mechanics. The
changes included how the selected units were stored as well as the defined physics layers used to raytrace and detect the selection box mesh collider. One of the multiple additive adjustment made from the reference was creating a 'box' which
encompasses the entire game scene, allocated to its own physics layer. This allows the raytracing of the selection box to create its mesh collider by referencing points assigned on uneven terrain and in the sky. The outlining of the selected units was
also integrated into each unit prefab using the provided script component of the third-party asset. This was integrated into the unit selection mechanics, embedding the enabling or disabling of each unit outline in the selection list, depending on
whether they are (accumulitively) added or removed. Outlining was also used to highlight enemy units which the selected units would target, and used additional auxiliary script components for each enemy unit prefab to enable/disable the outlining
script component. This was again achieved by using conditions of the play mode, raytracing, and physics layers. The result is the ability to select one or multiple units, and being able to assign one or multiple enemy targets specific to a given unit.
Low coupling of play modes were enforced, which involved lots of restructuring to minimise cross-dependencies between script components. This facilitated a seamless transition between the action, build, and unit selection modes.
What's Next:
Add more game units (outposts and space stations) and look into building upgrades. Explore addding unit secondary abilities. Start designing a game tutorial and develop the player UI.
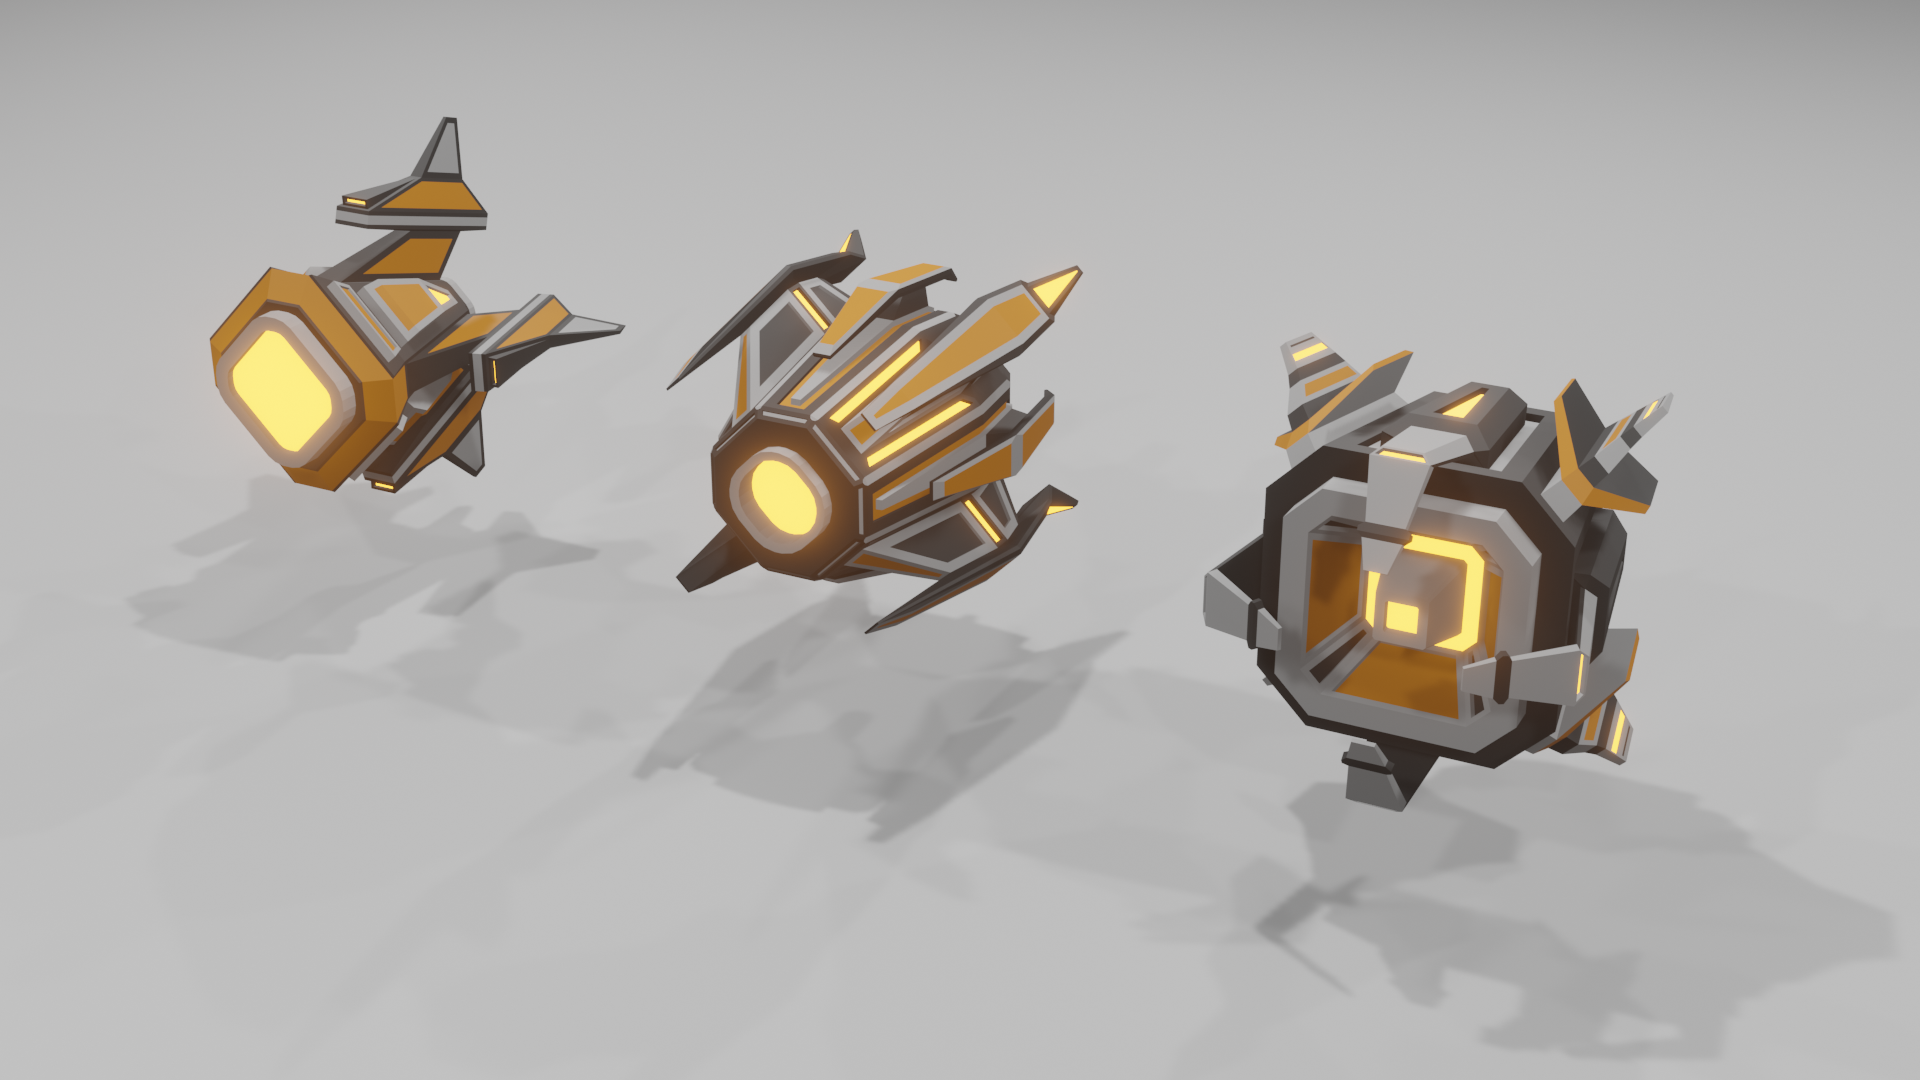
New Units:
A range of new units were created, including new ships and spacecraft carriers.
Ability Upgrade Limits:
The number of times an upgrade can be made on a particular ability/avatar attribute has been capped. The levels are now shown on the upgrade buttons.
What's Next:
Work on unit selection.
- - - - -
Space Gates, Abiity Upgrades, Space Docks, and Super Reactors
Added Phoenix ships.
06/09/2022
Enemy Space Gates:
New space gates randomly spawn just like the other enemies. These gate spawn a certain enemy type at a periodic rate.
Ability Upgrades:
Abilities can now be upgraded by adding extra duration time, each time they are purchased.
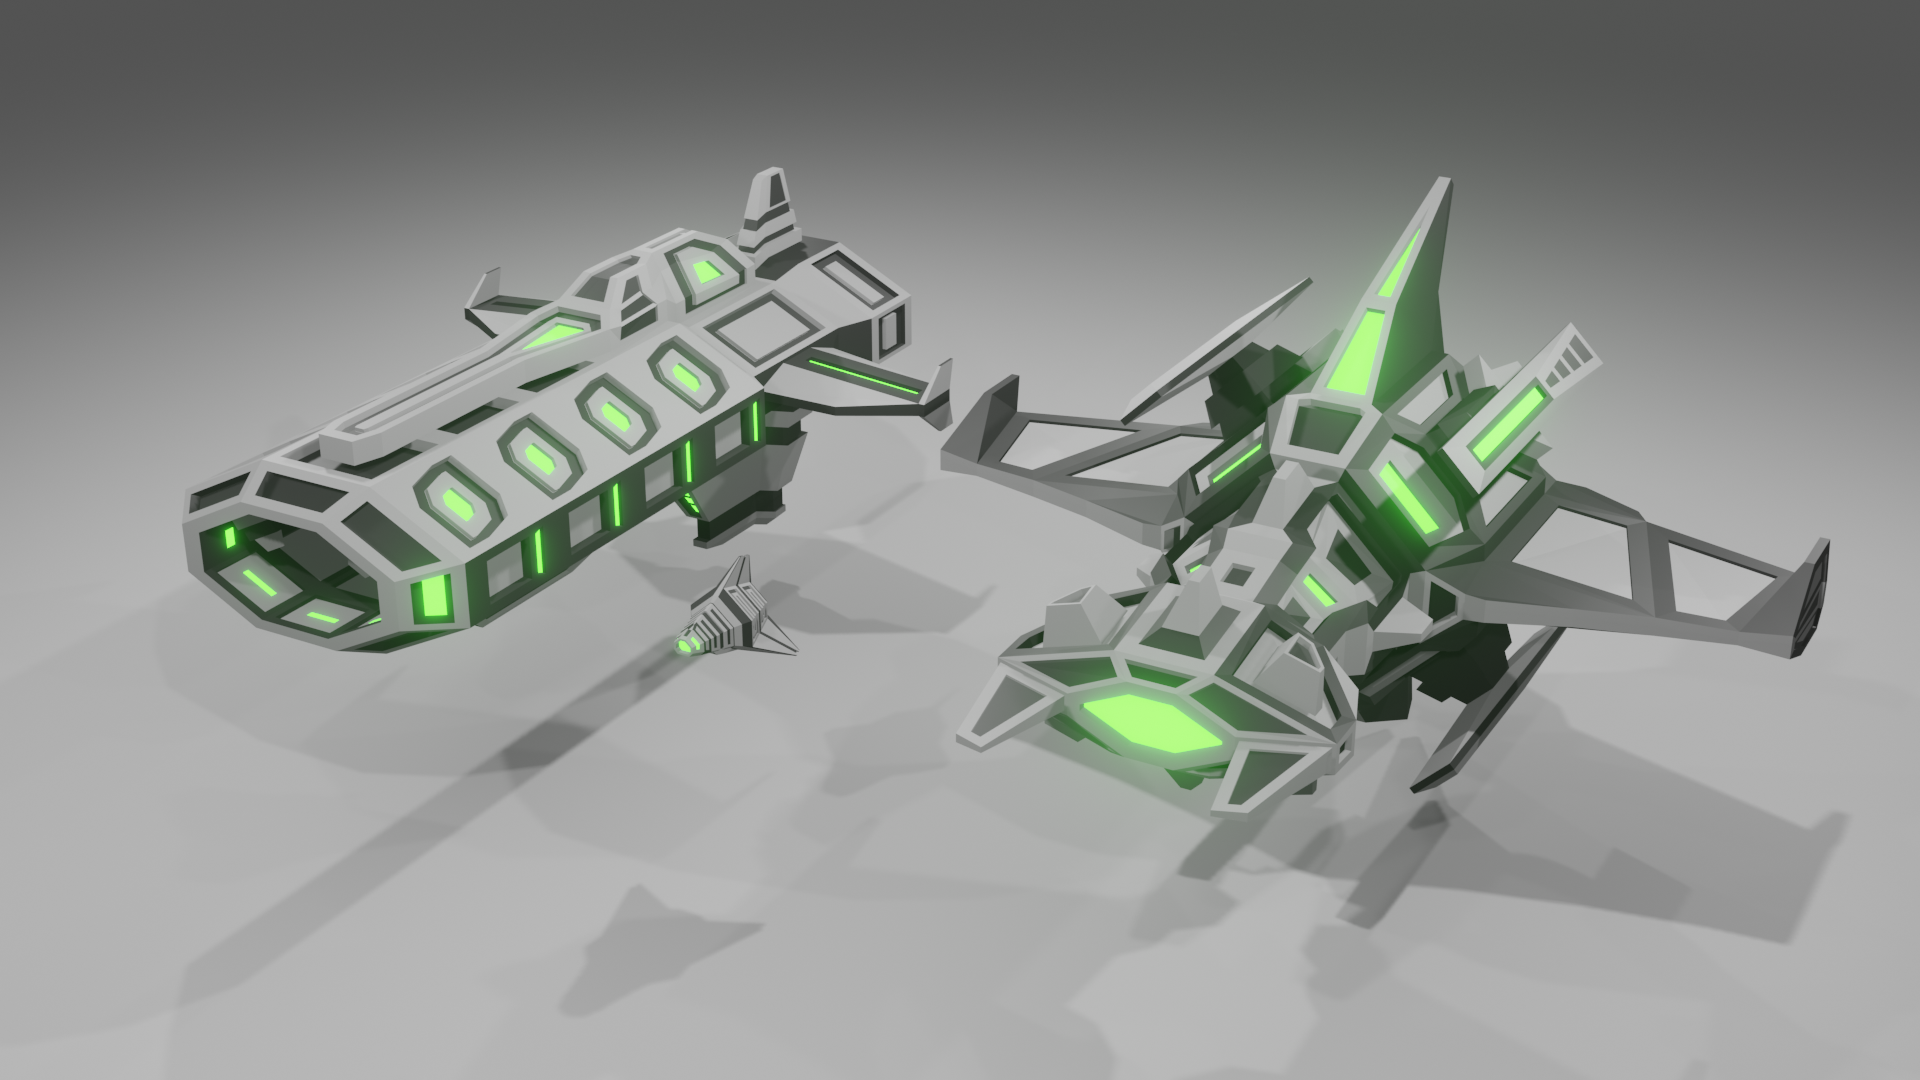
Space Docks, Phoenixes and Phoenix Drones:
A new building is used to produce larger ships. The Phoenix spacecraft comes with a smaller drone which accompanies its movement.
Super Reactor:
A super reactor was created to offer a more cost-effective alternative to the reactor.
What's Next:
Add upper limits to the energy, health, and credit metrics. Cap how much abilities can be upgraded. Continue to work on background and environment.
- - - - -
Commerce Centre, Unit Spawn Returns, and Game Balancing
Units get congregate around spawn origins when targets are null.
30/08/2022
Unit Spawn Returns:
Units now return back in range of their spawn points if they detect no enemies within their range. Using the hotkey [T], units will return to base, regardless if they are within range of an enemy target.
Commerce Centre:
These buildings multiply the population by a certain amount, increasing the potential workforce.
Game Balancing:
All game objects were adjusted to balance out the playability of the game.
What's Next:
Continue game balancing, think of extra features to implement, add more game objects. Add upper limits to the energy, health, and credit metrics. Continue to work on background and environment.
- - - - -
Adjusting Collisions, Game Environment, and Platform Cannons
Updated environment and background.
24/08/2022
Adjusting Collisions:
For all self-moving objects, including the player's avatar, the kinematic options on the rigid bod components were removed. The additional triggered collider components were also removed. Instead, the game objects' masses, drags, and angular drags were increased exponentially to offset some of the game physics. Upon a game object's 'death', the rigid body drag is reduced to '1' to allow the enabled gravity component to take effect on the game object.
Game Environemnt:
The platform game environemnts were added. These elements have a box collider to stop rigidbodies from moving through them.
Platform Cannons:
These cannons are fixed to the game's platform environments. They are enabled by 'fixing' them from within their respective repar menus. They can only be repaired if they are disabled. If they are disabled, they will not be targeted by enemy spacecraft and they are activated, they will become targets. If a cannon runs out of health points, they will become deactivated again. This was done by making the main 'Health.cs' death method a public virtual method, and overriding it in the sub-class.
Point and Fire:
Game objects will now only fire when they are looking at the target. Previously, game objects would fire as soon as a new target was registered. This created a large number of stray projectiles as they would rotate to the next target. This effect has now been greatly minimised by calculating a vector dot product from the originating game object, to the target's position.
Player Movement Fixes:
The player's avatar would previously vibrate slightly when colliding with game objects. This is because the 'Translate()' method would effectively move the avatar into position, yet the phyics system would then treat this action as non=viable. Instead, the rigid body component was used to move the player avatar.
New Enemies and Turrets:
New enemies and turrets were created. This consisted of refactoring a couple script components to superclasses/sub-classes etc., especially for game object movement and firing, to make adding new object types easier to implement and manage.
Bug Fixes:
While migrating the project to a new PC along with an updated version of Unity Editor, I noticed a bug where friendly game objects would frequently keep moving away from an enemy and move toward another enemy target. This would happen when quite a few enemies would exist in the scene or within the same vicinity. I couldn't exactly diagnose the problem as to why the friendly game objects would do this, however I seem to have fixed it. The supposed cause was the existence of a class property and temporary property with the same names within the same script component. Both properties are now temporary and use different names, which seemed to resolve the issue, at least for now. I also refactored and edited the movement scripts for friendly game objects. Now a target range is used to constrain the range at which the units can detect an enemy target. Firing ranges will therefore have to be lower than the specified target ranges for each friendly unit when it comes to game balancing.
What's Next:
Continue game balancing, think of extra features to implement, add more game objects. Add upper limits to the energy, health, and credit metrics. Continue to work on background and environment. Find a way to recall units back towards their spawn origin to prevent stranding,
Updated UI Icons:
Icons were created in Blender and converted into 2D GUI images for the various buttons in the player interface and research menu interface.
Research Menu:
A research menu was created with an assortment of unlockable abilities and upgrades. The costs of upgrades will increase each time they are purchased.
What's Next:
Continue game balancing, think of extra features to implement, add more game objects. Add upper limits to the energy, health, and credit metrics.
New Turrets, Production Times, and Production Menus
New cannon turrets.
05/08/2022
New Turret Game Objects:
Dividing the construction menu into sub-menus allowed for a larger building option capacity. As a result, more building objects will be added to further improve the gameplaying exprience. For now, more turrets were created. First of all, the existing turret scripts were refactored to inherit from two possible superclass scripts: one being turrets which fire one projectile at a time, and the other being two at a time. This makes it easier in future to declare and manage turrets categorised by how many projectiles they fire simultaneously. They are separated this way because this is the most discerning feature in terms of the scripts' structures. This also allows for new turret game objects to be created by inheriting from the superclasses, and defining their unique characteristics such as range, fire rate, and projection speed in the subclass constructors.
The addition process itself started with creating the Blender models. Once they were configured as exportable FBX objects in Blender (mesh clean-ups, clearing UV maps, object scale factor and axis orientations), they were imported to Unity where further configs were made on the game engine's side (baking axis conversions, extracting the material folders, and adjusting the material hex values and other properties). The FBX objects were then assigned box collider and rigid body components with the same settings as the existing turrets. The turret resource requirements and health scripts were assigned to the game objects, and the firing functionality scripts were assigned to the turret head child objects. The impact effect prefabs were assigned to the projectile prefabs using the Unity inspector.
The projectile prefabs and firing origins were then assigned for each of the turrets under the script component listing within the inspector. Game object prefabs were then made for these turrets. The FBX models were duplicated and assigned the translucent orange material for the blueprint game objects, and were bound with their own blueprint subclass scripts. The corresponding prefab game objects of the turrets were allocated under the blueprint script component in the inspector listing for the blueprint script components. Info cards were made to display their information to the construction interface, and the associated buttons were created in the construction sub-menu. Finally, the info cards and blueprint prefabs were plugged into the buttons' script components listed within the inspector.
Production Times:
Production times were added to all the producible units. This was done by adding production times to each unit prefab within their unit cost script components. These were retrieved by the spawn effect subclass script components for the unit-specific spawn effects for measuring how long the effect will last, and the production building script components for the production delay coroutines.
Debugging Production Menus:
The production menus now operate as intended. When the player selects a building, the associated building is displayed on the construction UI. If the player then selects another building, the new production will replace the old one. If the player clicks anywhere that isn't on the production menu or the associated building, no production menu will display. The process involved a few references and public static Boolean toggles. The main issue was trying to manage these various toggles to check whether their states were correct in a given situation, and combine them together using Boolean operators to create the correct conditions to display the production menus. The previously-experienced bugs included production menus opening on top of other production menus, menus which would not open as expected upon a given mouse event, and menus behaving unexpectedly when clicking on them with a different building behind it. These bugs were diagnosed and eventually resolved, given multiple test scenarios.
The solution involved monitoring raycasts to detect player cursor position and click events to check whether they were clicking or hovering over certain game objects or UI elements, and passing around game object references a token for active production menus.
What's Next:
Begin researching how to make a tech tree. Bind avatar abilities with number hotkeys. Allow availability of abilities through future tech tree.
Spawn Effects:
Spawn effects are now created at the production buildings before units are instantiated. The prefab of the spawn effect with an assigned script component. This component uses a coroutine to stop playing the effect after a certain amount of time. The game object is destroyed a few seconds after to let the effect phase out.
Avatar Shield:
An avatar shield was created to absorb any enemy projectiles. The shield outer mesh has a sphere collider, which is on a physics layer that specifically detects collisions with enemy projectiles. Both the inner and outer mesh materials use URP lit shader graphs.
Energy:
Energy was added as a contraint on enabling player firing and special abilities. An energy bar was added in the same way as the other resource bars, with the maximum energy, energy level, and recharge rates being public static variables.
Avatar Abilities and Buttons:
Within the script components of the avatar's abilities, energy requirements and lifetimes were defined. These are used to evaluate whether the player is able to activate the corresponding abilities based on whether they have sufficient energy. Once an ability is selected and activated, a coroutine will disable the button's functionality for the duration of the ability's lifetime, and re-enable it afterwards. So far, abilities work for deploying the avatar's shield and supporting drone. The accessibility of these buttons will later be bound to hotkeys, and made available through the future tech tree.
Restructuring Build Menu:
The construction options are now listed under sub-menus. So far, the construction options are separated into three categories. The buttons used to access the sub-menus use a script component, which activate their corresponding build panels, and deactivate an array of the rest of the build category panels.
What's Next:
Begin researching how to make a tech tree. Bind avatar abilities with number hotkeys. Allow availability of abilities through future tech tree. Create more game objects.
Construction Adjustments and Object-Specific Building Production Menus
Building droids and tanks from specific buildings.
29/07/2022
Object-Specific Menus:
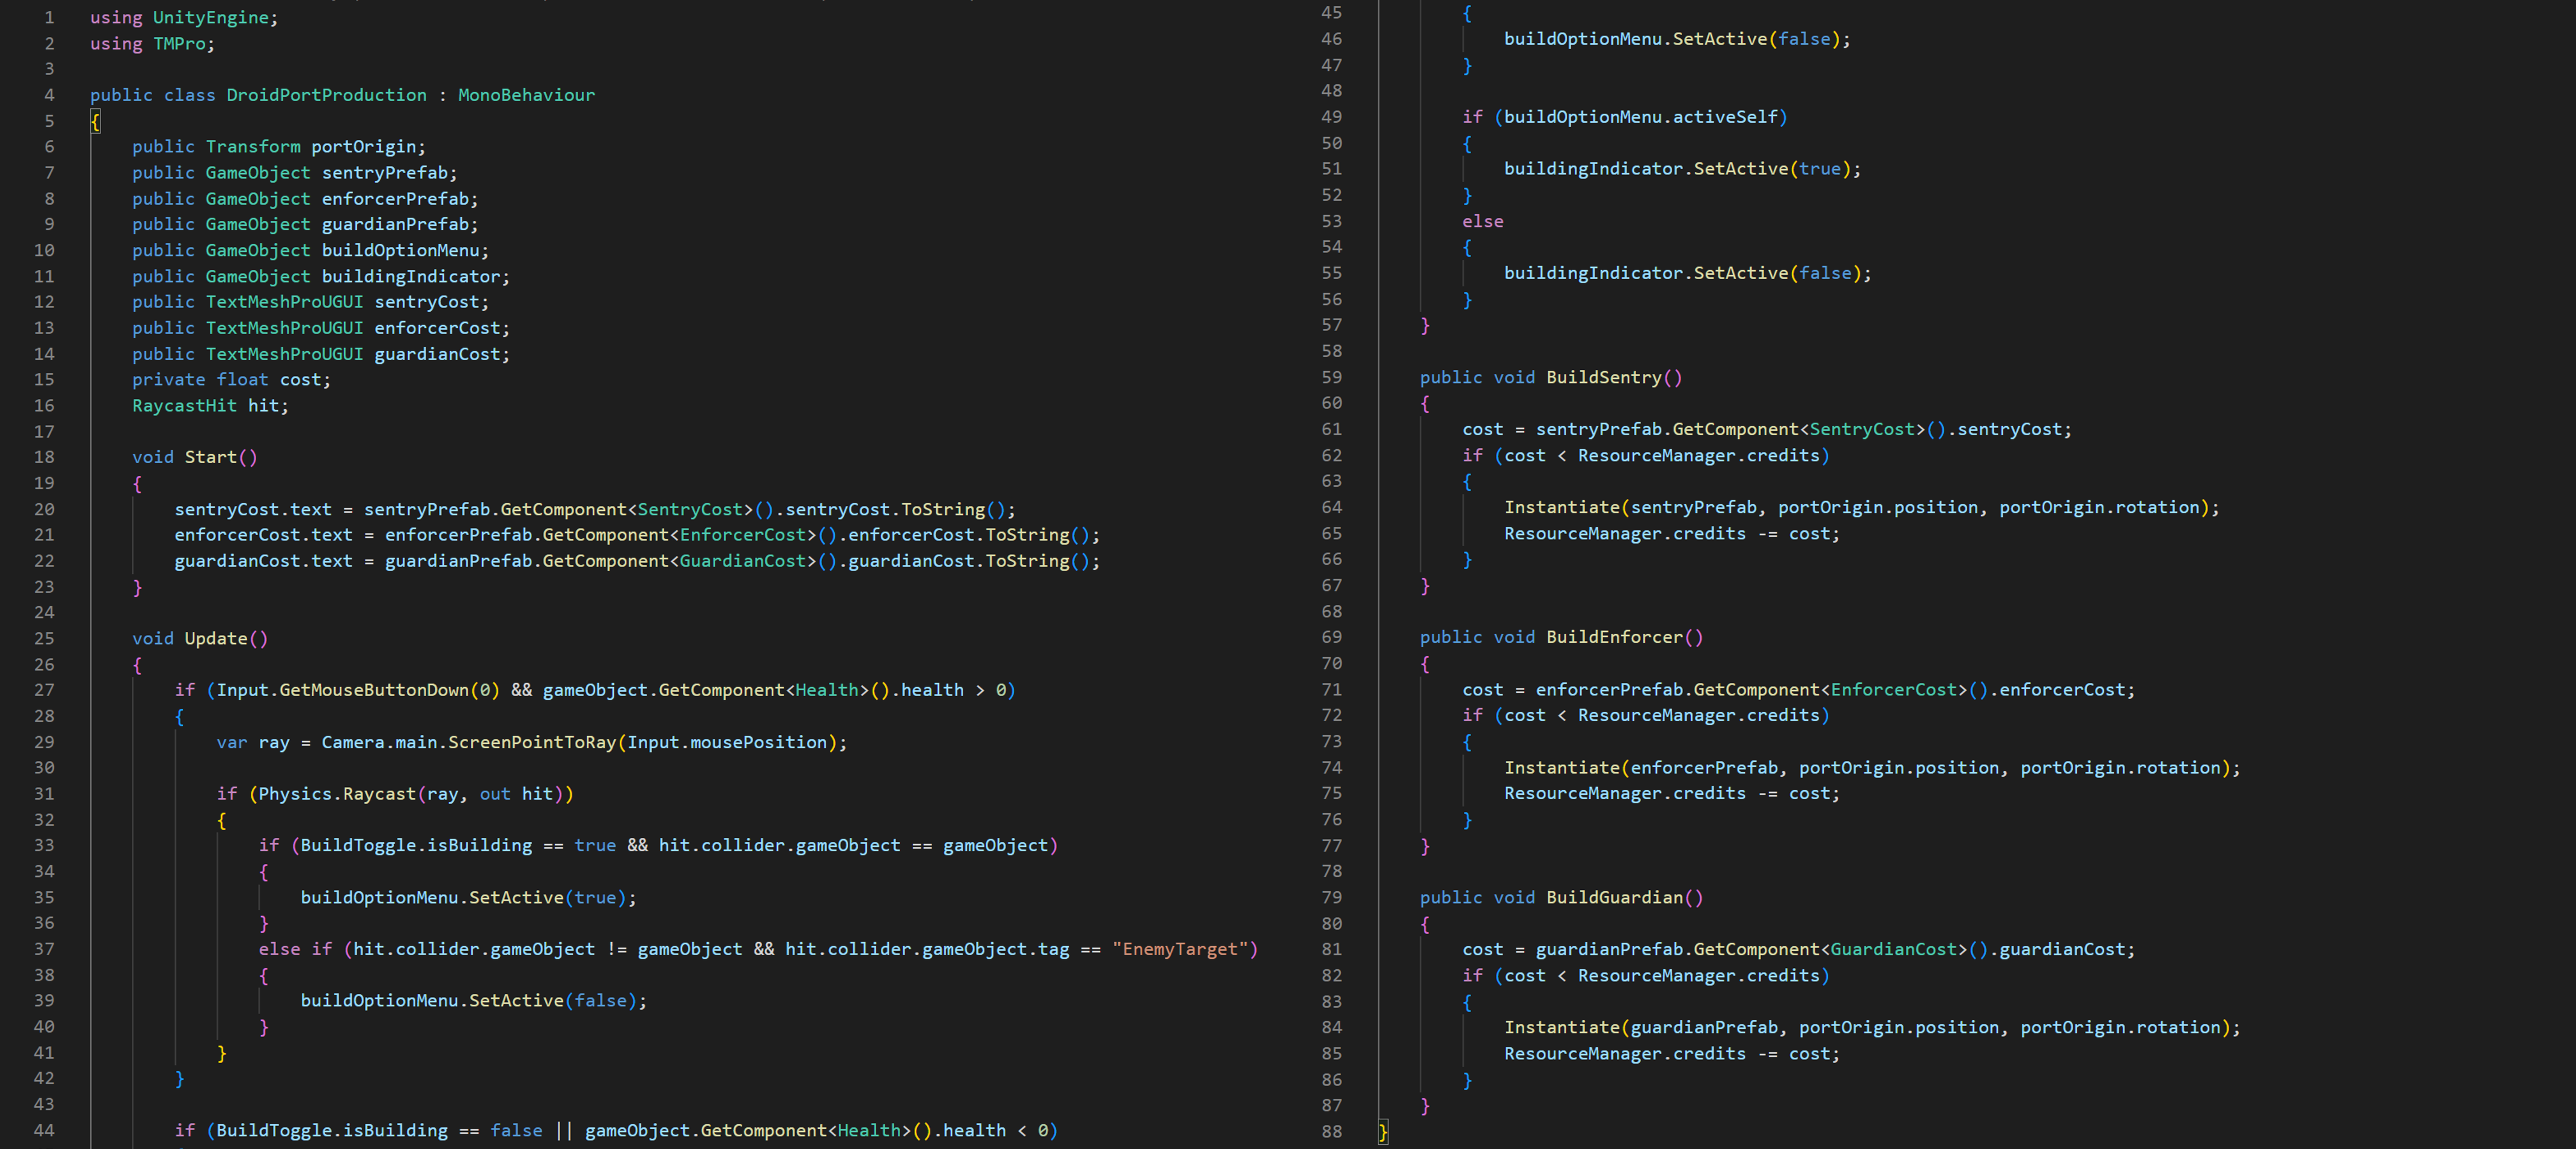
Droids (Sentry, Enforcer, and Guardian) are now built from a single port. This is facilitated by a construction menu which is allocated to each production building. This involved condensing and refactoring a wide range of script components, blueprints, and prefabs for the previously-existing droid port assets. The same procedure was done with the factory, which is now refactored as the Vehicle Bay. This allows the player to construct multiple types of droids from a single building. The same applies to vehicles, if more are added in the future. Each production building contains a UI build menu which contains a panel of button(s) which execute methods housed within the main building script component. These buttons evaluate sufficient credits, and instantiate the corresponding game object prefabs. A glowing marker was also added above the building which the player is currently using, to better identify production origin.
What's Next:
Continue with game balancing. Continue to develop the player interface. Begin researching how to make a tech tree. Link the TMPro info cards to the building prefabs to retrieve building data.
Droid port production script component for port building prefab.
Raycasting, Research Centre, and More Resource Management
24/07/2022
Raycast Aiming:
If the player hovers their cursor over an enemy, the avatar's turrets will now follow the proper orientation in all axes. If the turrets are not looking towards an enemy, their rotations will be isolated to only around the Y axis.
Research Centre:
A research centre was modelled, and a particle effect was added. The usual blueprint, health and requirement scripts, and box colliders for the prefab and the blueprints were added, and the associated construction button was made functional in the build menu. The research centre produces knowledge points, which will be used to progress through the future tech tree.
Game Object Deaths:
Health was now reintroduced to the tank and droid objects (except for the repair droids). Since the existing colliders were attached with triggers to prevent them from overlapping, another collider was added so that enemy projectiles will be detected as they collide with the game objects. Tank and droid movements now check whether their kinematic properties are enabled before they move. The tank turrets also check whether the rigid bodies of their parent tank objects are kinematic, before deciding to act.
Destroyed Building Resources:
Resource management for each building wasa reallocated from their corresponding blueprint script components, to their prefab requirements script components. Resources were added/removed/reimbursed using 'Start()' and 'OnDestroy()' functions. Resource producers also had their output management reallocated from their blueprint scripts to their corresponding production output scripts.
What's Next:
Continue with resource management functionality for when buildings are destroyed and game balancing. Continue to develop the player interface. Begin researching how to make a tech tree. Start looking at construction menus for individual buildings e.g. tank factories and droid ports.
- - - - -
Sprite Collisions, Resource Display, and Building Placement
23/07/2022
Sprite Collisions:
I enabled the 'Trigger' options on all the mesh and box colliders for all the procedurally generated game objects. This included all the drones and tanks. I then added 'OnTriggerStay()' methods to the associated movement script components, which detect the collisions based on game object tags. This meant that if these objects collide with one another, they will be translated away from each other by establishing the opposite vector between the subject game object and the involved collider. As a result, none of these game objects will remain overlapped and clipped within each other, resulting from a grouping effect.
Building Placement Collisions:
I used a similar mechanism to the sprite collision detection. I added triggered box colliders to all the blueprint prefabs, with their bounds half a unit within the building dimensions, and used a Boolean flag to determine whether a building blueprint could be replaced by its respective prefab, such that it would not overlap an existing building.
Resource Display:
A new resource display was added to the player's UI. Two dynamic bars show the proportion of power and population that is used and in excess. The values of the excess resources are shown to the right of each bar. Credits are also displayed just below.
What's Next:
Continue with resource management functionality (when buildings are destroyed) and game balancing. Continue to develop the player interface. Start modelling the research centre and making it placeable within the game. Begin researching how to make a tech tree.
- - - - -
Resource Management and Building Placement
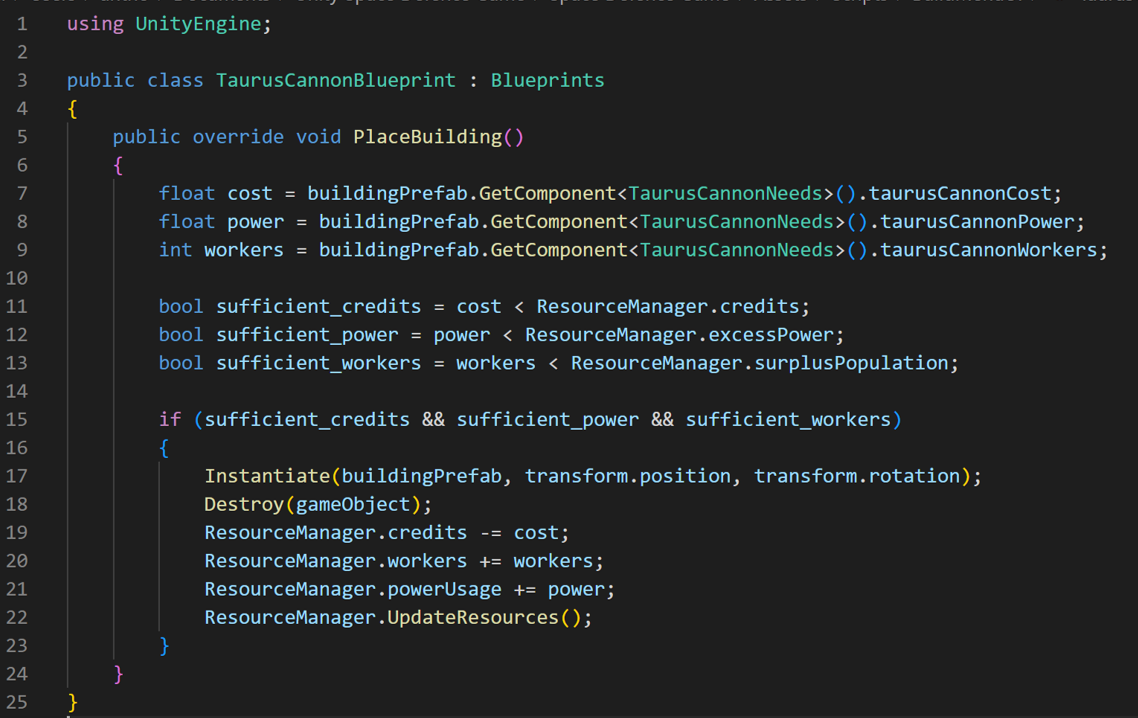
Subclass script component for resource validation and management for Taurus Cannon construction blueprint.
14/07/2022
Tailored Blueprints:
I made the generic 'Blueprint.cs' script component into an abstract superclass. This is because each building overtaking their respective blueprints required a different action set when going through the resource validation process. As a result, this required declaring a public virtual method called 'PlaceBuilding()', which would be overridden by the subclass scripts for each construction blueprint. The scripts for each blueprint have a similar structure to the image above, with slight variations for buildings such as power plants, refineries, and residences, which all produce a resource. The scripts retrieve the resource requirement components from the building prefabs assigned to their respective blueprints, and compare them with the public static variables defined in 'ResourceManager.cs', a component attached to an empty game object of the same name. Once the values have been evaluated as Boolean conditions, a building prefab will replace the construction blueprint if it meets the three criteria of sufficient credits, power, and workers. Once placed, a call to the method 'UpdateResources()' (found in 'ResourceManager.cs') will apply the updated values to the global resource record. This was chosen over a simple 'Update()' method in the resource manager, as needlessly performing the same calculations dozens of times per second is not optimal for performance. If the player does not have the sufficient resources to place the building, the prefab replacement will not take place, and the blueprint will remain with the cursor until the conditions are met upon the next left mouse click, or the selection is cancelled with a right mouse click.
Placement Rotation:
I also made it possible for the player to change the orientations of the buildings in the blueprint phase of building placement. The blueprint will rotate in 90-degree increments according to the clicks of the left and right arrow buttons, and the resulting building prefab that replaces it will automatically follow the desired rotation.
What's Next:
Continue with resource management functionality (when buildings are destroyed) and game balancing. Continue to develop the player interface.
- - - - -
Building Placement, Health Bar, UI, and Resources
Building placement from the UI.
13/07/2022
Building Placement:
The foundations for building placement have been complete. This involved creating blueprint prefabs for each building to simulate their positioning as the player navigates their cursor around the map. Once the player selects the specified location, the blueprint is replaced with the intended building. Whilst doing this, I streamlined the build option buttons into one script, since the only difference between them were the prefab game objects which would be declared in the inspector. Later build functionality will be to change the values in the resource manager upon building placement, as well as checking for valid placement. The second might be harder to accomplish compared to the the grid-based system in my 2D Python version.
Health Bar:
A health bar for the player's avatar is now at the top-left corner of the display.
Player Interface:
The structure of the player's overall in-game interface has been templated, including panels for other metrics such as power, credits, and population.
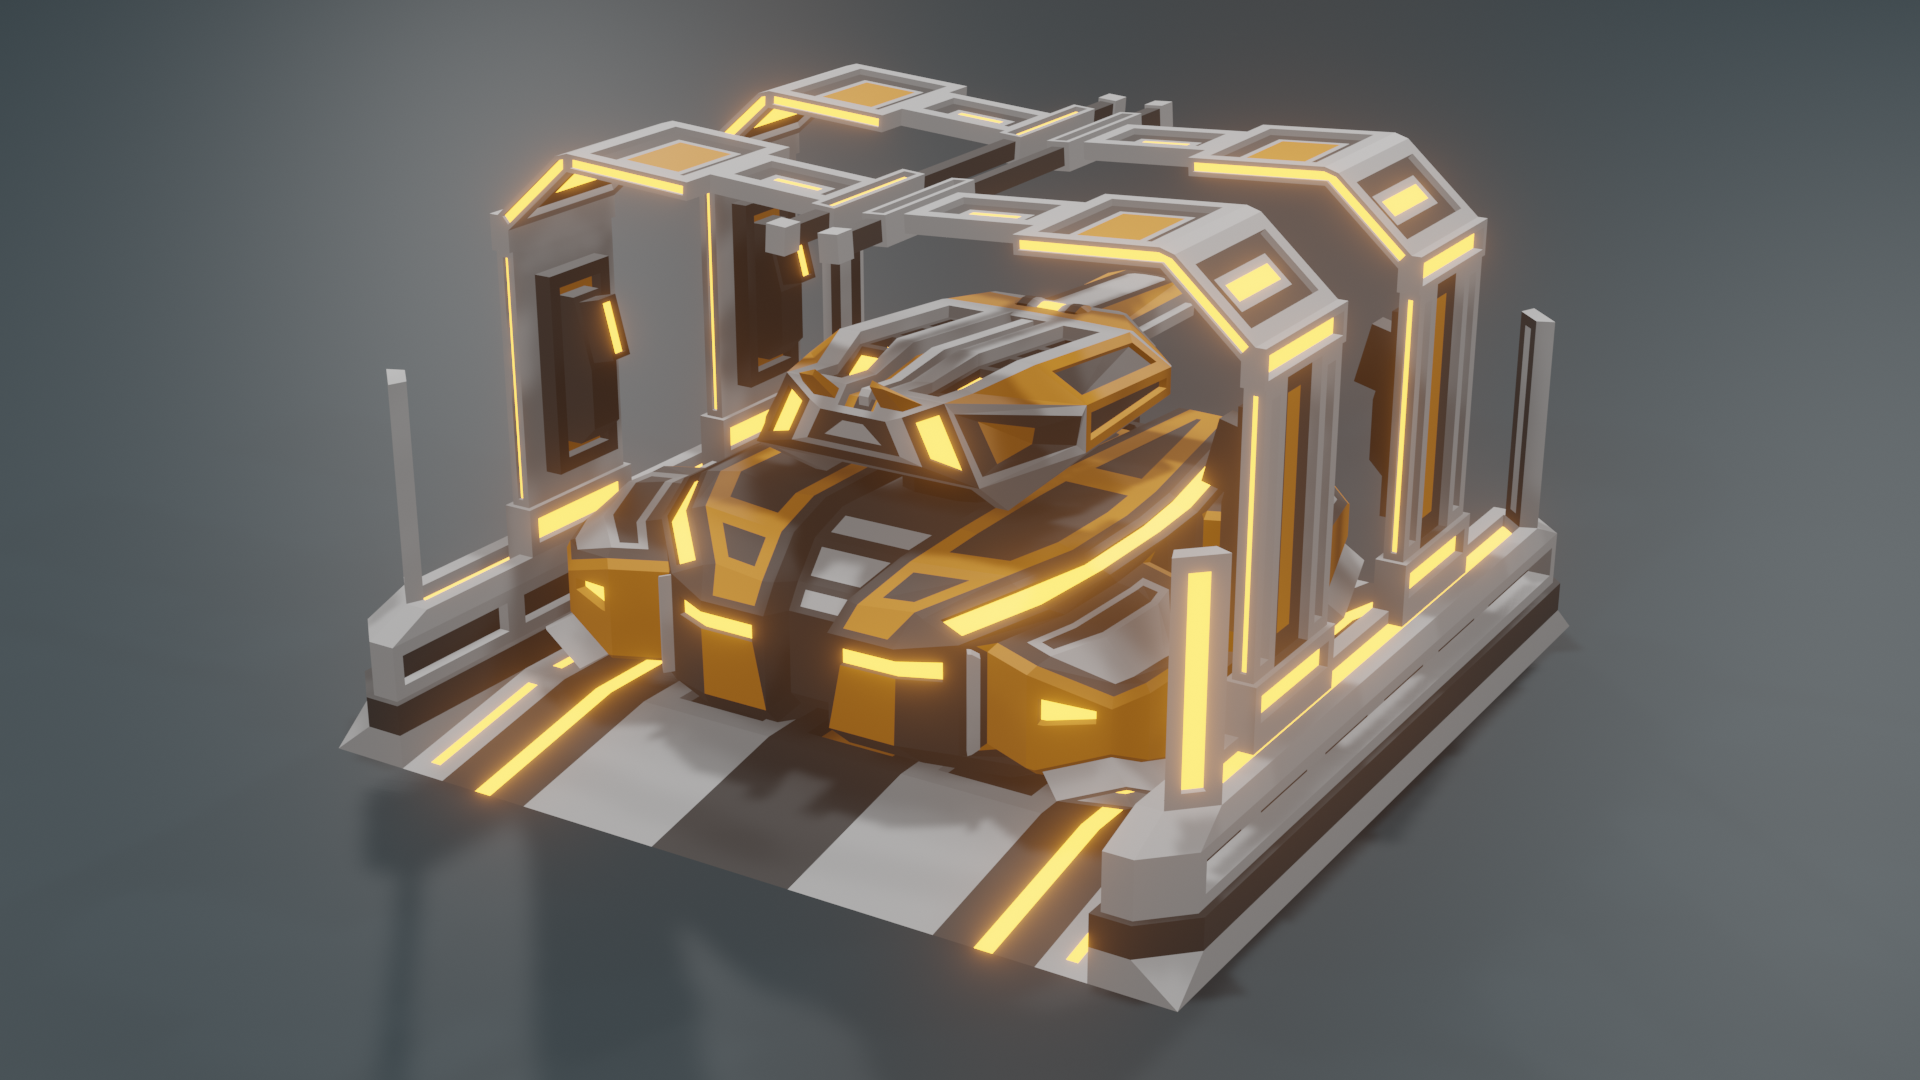
New Refineries:
A new model for the refineries has been created, along with visual effects. Graphics have also been applied to power plants.
Resources:
Each placeable game object now has their own needs or output volumes.
What's Next:
Continue with the build interface and perhaps create a repair bay. Continue with resource management functionality and game balancing.
Repair Drone and Dock:
I created a repair dock which spawns repair drones. These drones will navigate to and replenish the nearest game object with less-than maximum health. The drones will then move onto the next candidae object. The repair drone prefab object is embedded into the repair dock prefab object, thereby not requiring an instantiating script. This is because only one repair drone is allowed per dock. Enemy ships will not perceive the drones as a threat, but will attack the docks they originate from.
Health:
Health points were added to the game's friendly objects. A superclass was created to manage the damage received and healing methods, as well as the dying behaviour. Similar to enemy entities, once health runs out, their kinematics are disabled and gravity is enabled. If the game object is not the player's avatar, it will be destroyed after three seconds. The actual health points assigned to each prefab were declared in subclass script components.
What's Next:
Continue with the build interface and perhaps create a repair bay specifically for the player's avatar. Make entire playable interface visibility toggled. Create a revised animated version of the refinery.
- - - - -
Build Menu UI
Start of the build menu UI.
06/07/2022
Build Menu:
The player can now access a build menu by pressing the [E] key. They can hover over each button option, and a window displaying the build details will be shown in the top-left corner. I also ensured that the panels will adjust their positioning correctly on different screen dimensions.
Small Bug Fix:
A runtime error occurred every time a Carrier spawned a Fighter, since kinematic objects could not be assigned a linear value from within a script. As a result, the abstract superclass for enemy movement now holds a condition to check whether the enemy's procedurally generated prefabto check whether it has a kinematic rigid body, before it is assigned a velocity.
What's Next:
Create a repair droid which will replenish health to buildings and friendly forces, and continue with the build menu UI (add menu button onto main UI) and building placement functionality.
- - - - -
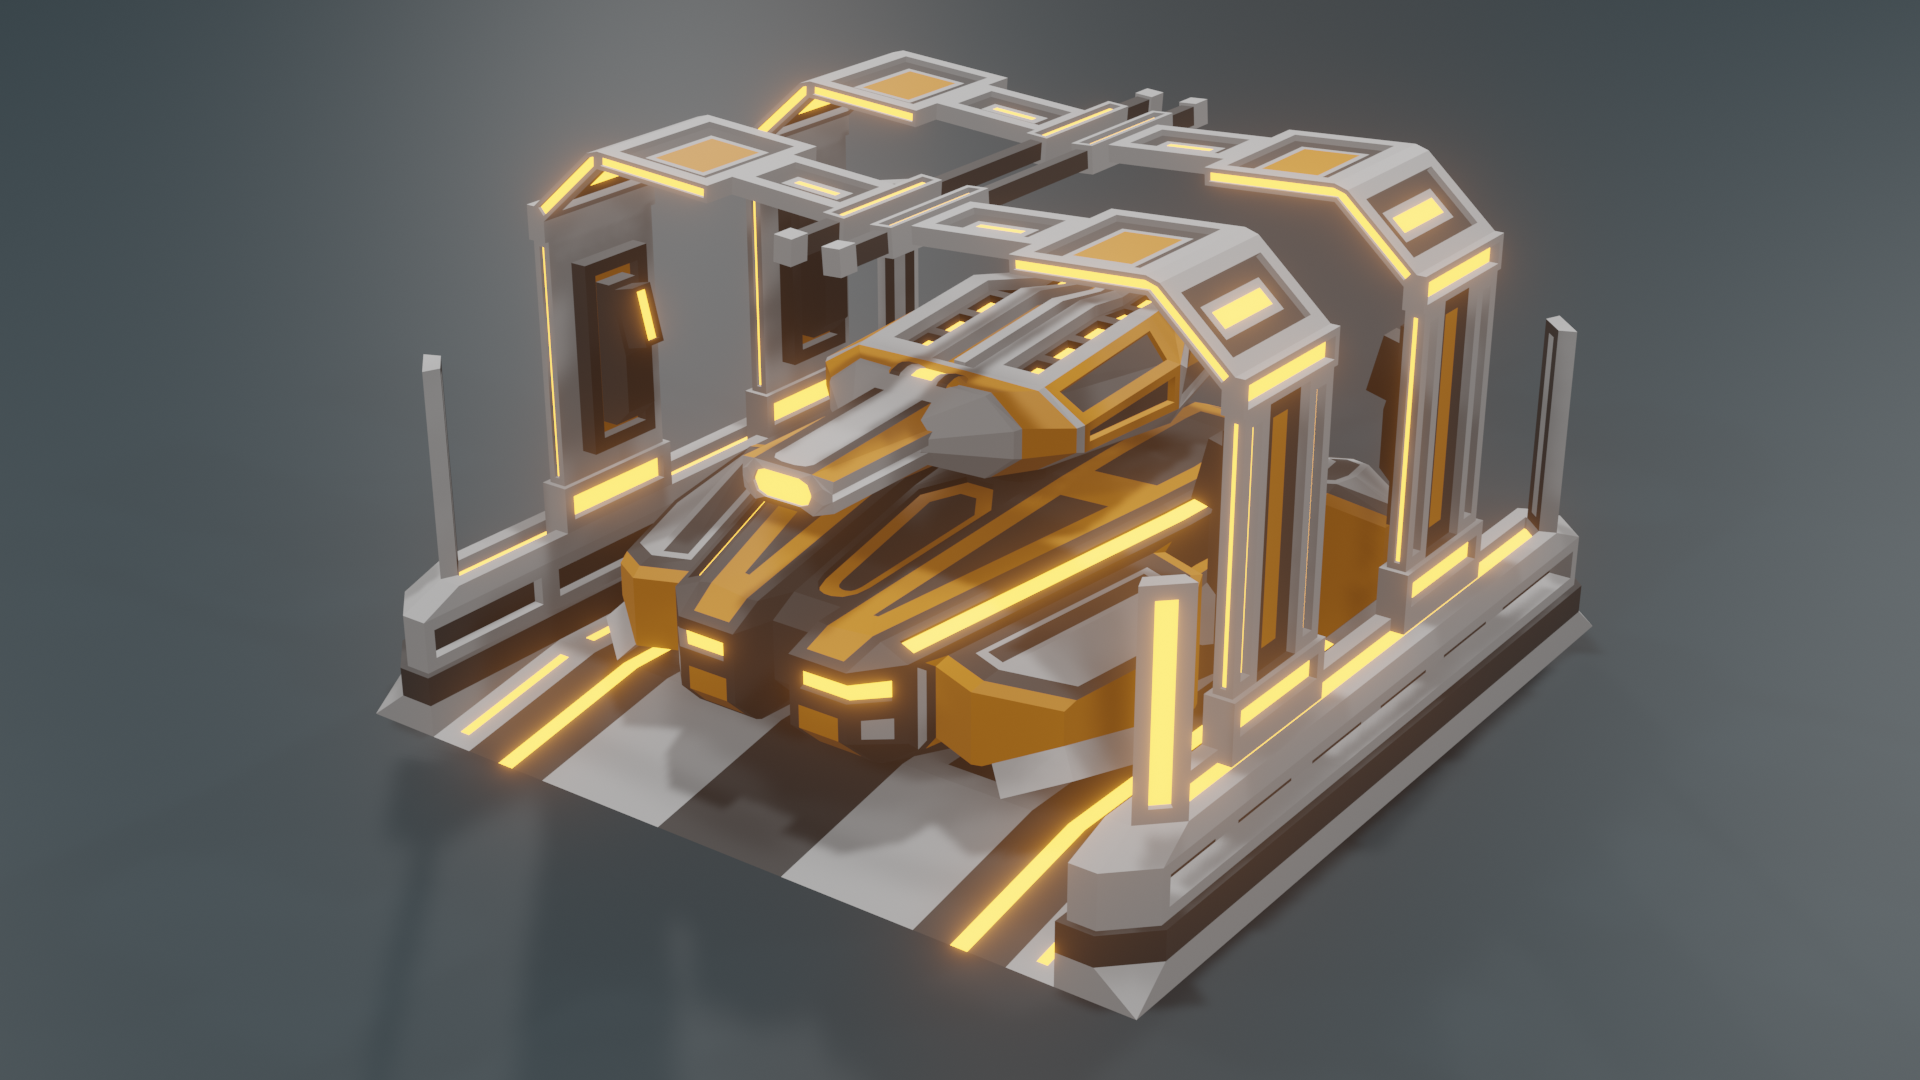
Photon Tank and Interface Building
Tank model parked in its factory bay.
04/07/2022
Photon Tanks:
These tanks move across the map and shoot towards enemy spacecraft when in range. The turret heads move and rotate separately from the vehicles' bodies. They are instantiated from the new factory buildings.
Interface Building:
The basic structure and functionalities for the main menu, options menu, and pause menu have been established.
Small Fixes:
Among some minor adjustments, idle turret heads now rotate around the global Y axis as opposed to their local ones. This was found out by realising that the rotation method defaulted to the latter setting when unspecified within the method call.
What's Next:
Try to prevent game objects from overlapping with one another as they create a grouping effect, and continue building the game's interface, including construction/production menus.
Random Generation:
Enemies will now generate randomly in the outer bounds of the map at different intervals, depending on the enemy type.
Physics Layers:
To prevent projectiles from colliding into each other and other objects, physics layers were divided into 'friendly', 'friendly projectiles', 'enemies', and 'enemy projectiles' layers. Each projectile is also scripted to ignore collisions with other projectiles on the same physics layer.
What's Next:
Building the game interface.
- - - - -
New Enemies, Return Paths, and Game Balancing
Three new enemies: Carrier, Fighter, and Annihilator.
30/06/2022
New Enemies:
The Annihilator is an additional enemy that succeeds the Battleship.
The Carrier procedurally generates Fighter ships with their own pathing scripts towards the target.
Droid Pathing:
Droids now return to their original spawn points if there are no more enemies within their range. If by chance they incur an enemy along the way, they will encounter. This is to prevent the droids from being stranded or confined to a particular area of the map, far away from their original spawn point.
Game Balancing:
Values such as damage, movement speed, health, and firing rate were all adjusted for more suitable gameplay.
- - - - -
Rotations and Automated Droids
Droids created in Blender.
28/06/2022
New Droids:
I created and scripted some droids which attack the nearest enemy ships, having their own ranges, attack speeds, and damage values. They are instantiated once their respective port buildings are created in the game's scene.
Smooth Rotations:
To adjust the smoothness of rotations of the turret heads and avatar drone, I updated the look functionality to include Quarterions and Lerp functions. This was taken from the tutorial created by Brackeys, listed below.
Refactoring and Inheritance:
I further distributed the inheritance hierarchies for enemy ship movements and game projectiles. Each enemy type now has its own fire rate, on top of their existing ranges and movement speeds. There are two types of projectile script components, one for the enemies, and one
of the 'friendlies'. Each game object type can specify their own damage.
What's Next:
Random generation of enemies on the outer bounds of the map.
Encounter between turrets, enemy ships, and avatar's drone.
27/06/2022
A large amount of progress was made over the past few days. Firstly, the enemy ships are now able to pursue the player's avatar at different speed, and stop when within their relevant ranges of fire. Firing functionalities were given to both the avatar's turrets, and enemy ships, which inflict damage on the receiving end. Once a ship runs out of health, their gravity is enabled, and their kinematics and movement script are disabled. An avatar drone was also scripted to orbit
around the moving avatar, and rotate to shoot at its closest enemy target. Finally, turrets were created to shoot the closest enemies from the ground, with their own attributes for damage and range.
Aerial view, projectiles modified to negligible mass.
Enemy Movement:
To facilitate enemy movement, a superclass was created to determine the general pathfinding and attacking behaviours of the enemy ships. This included identifying the target(s), determining the firing properties such as rate of fire and projection speed, as well as anticipating input objects such as the origins of firing the projectiles, and the projectile prefab. The process of identifying targets involves scanning the entire game scene for object instances with the appended tag
"EnemyTarget". If successful, the script will perform vector calculations to determine which of these objects are closest. Once identified, the enemy ship will move towards the object and attack when within its specified range. The target is updated every 0.5 seconds, rather than dozens of times per second to avoid excess computations. If the enemy ship is within range, it will instantiate the projectile prefab along with its accompanying script. To prevent a vector zero error,
the enemy ship will stop rotating when clipping within the player's avatar position. The superclass was used as an abstract class, where the enemy movement and speed variables were assigned values in their corresponding subclasses.
Projectile Prefabs:
Each projectile script component was specific to the enemy/object type. Once instantiated, the projectile's lifespan is only 3 seconds before it is automantically destroyed. If the projectile collides with an object, the projectile will be prematurely destroyed. If the object possesses a component "enemyHealth" or "health", it takes information from the collided object, and performs a method which deducts a determined quantity of health from the receiver, dependent on the type of projectile.
Avatar Drone:
The avatar drone largely follows the same target identification procedure as the enemy ships, however, the drone is constrained to the orbit around the player's avatar. When the drone is engaging with an enemy, it will face the enemy ship. When it is idle, it will orbit facing away from the player's avatar.
Turrets:
The turret head components followed the same mechanisms as the the enemy ships and avatar drone. Each turret has a different projectile that infllicts different values of damage, along with projection speeds and firing rates.
Prefabs:
Most, if not all objects along with their corresponding components were converted into prefabs. This is because they will be generated procedurally during runtime.
What's Next:
The current plan is to make smoothen object rotations as they lock onto new targets. This will apply to the turret heads and the avatar's drone. This will presumably involve Quaternions and Lerp functions. Enemy ships will also be randomly generated from certain regions of the map, at specified intervals, hopefully facilitating a wave format.
Establishing Basic Player Movement and Camera Controls
Player movement and camera controls.
24/06/2022
After successfully importing the avatar model into Unity, basic player movement was created. An avatar rig was added to the model, and the root node was set to the model's primary body. The added script component used player input along the to move along all three axes, and vectors were used to identify the direction of movement. Quaternions were used to rotate the avatar between directions to create more fluid transitions. To enable the rotation of the avatar's
turrets, a separate script was created that took these objects as inputs. The turrets rotate to look at the relative positioning of the player's mouse on the screen. I also implemented some camera controls, which lets the user rotate in all axes around the avatar object via a rotation script component attached to a separate camera control instance which took the camera and avatara objects as transform inputs. Camera zoom capabilities were also added, handled by a script component applied directly onto the main camera object. Zoom limit contraints were also imposed to preserve the camera's playability. The references used for the scripting components were the following:
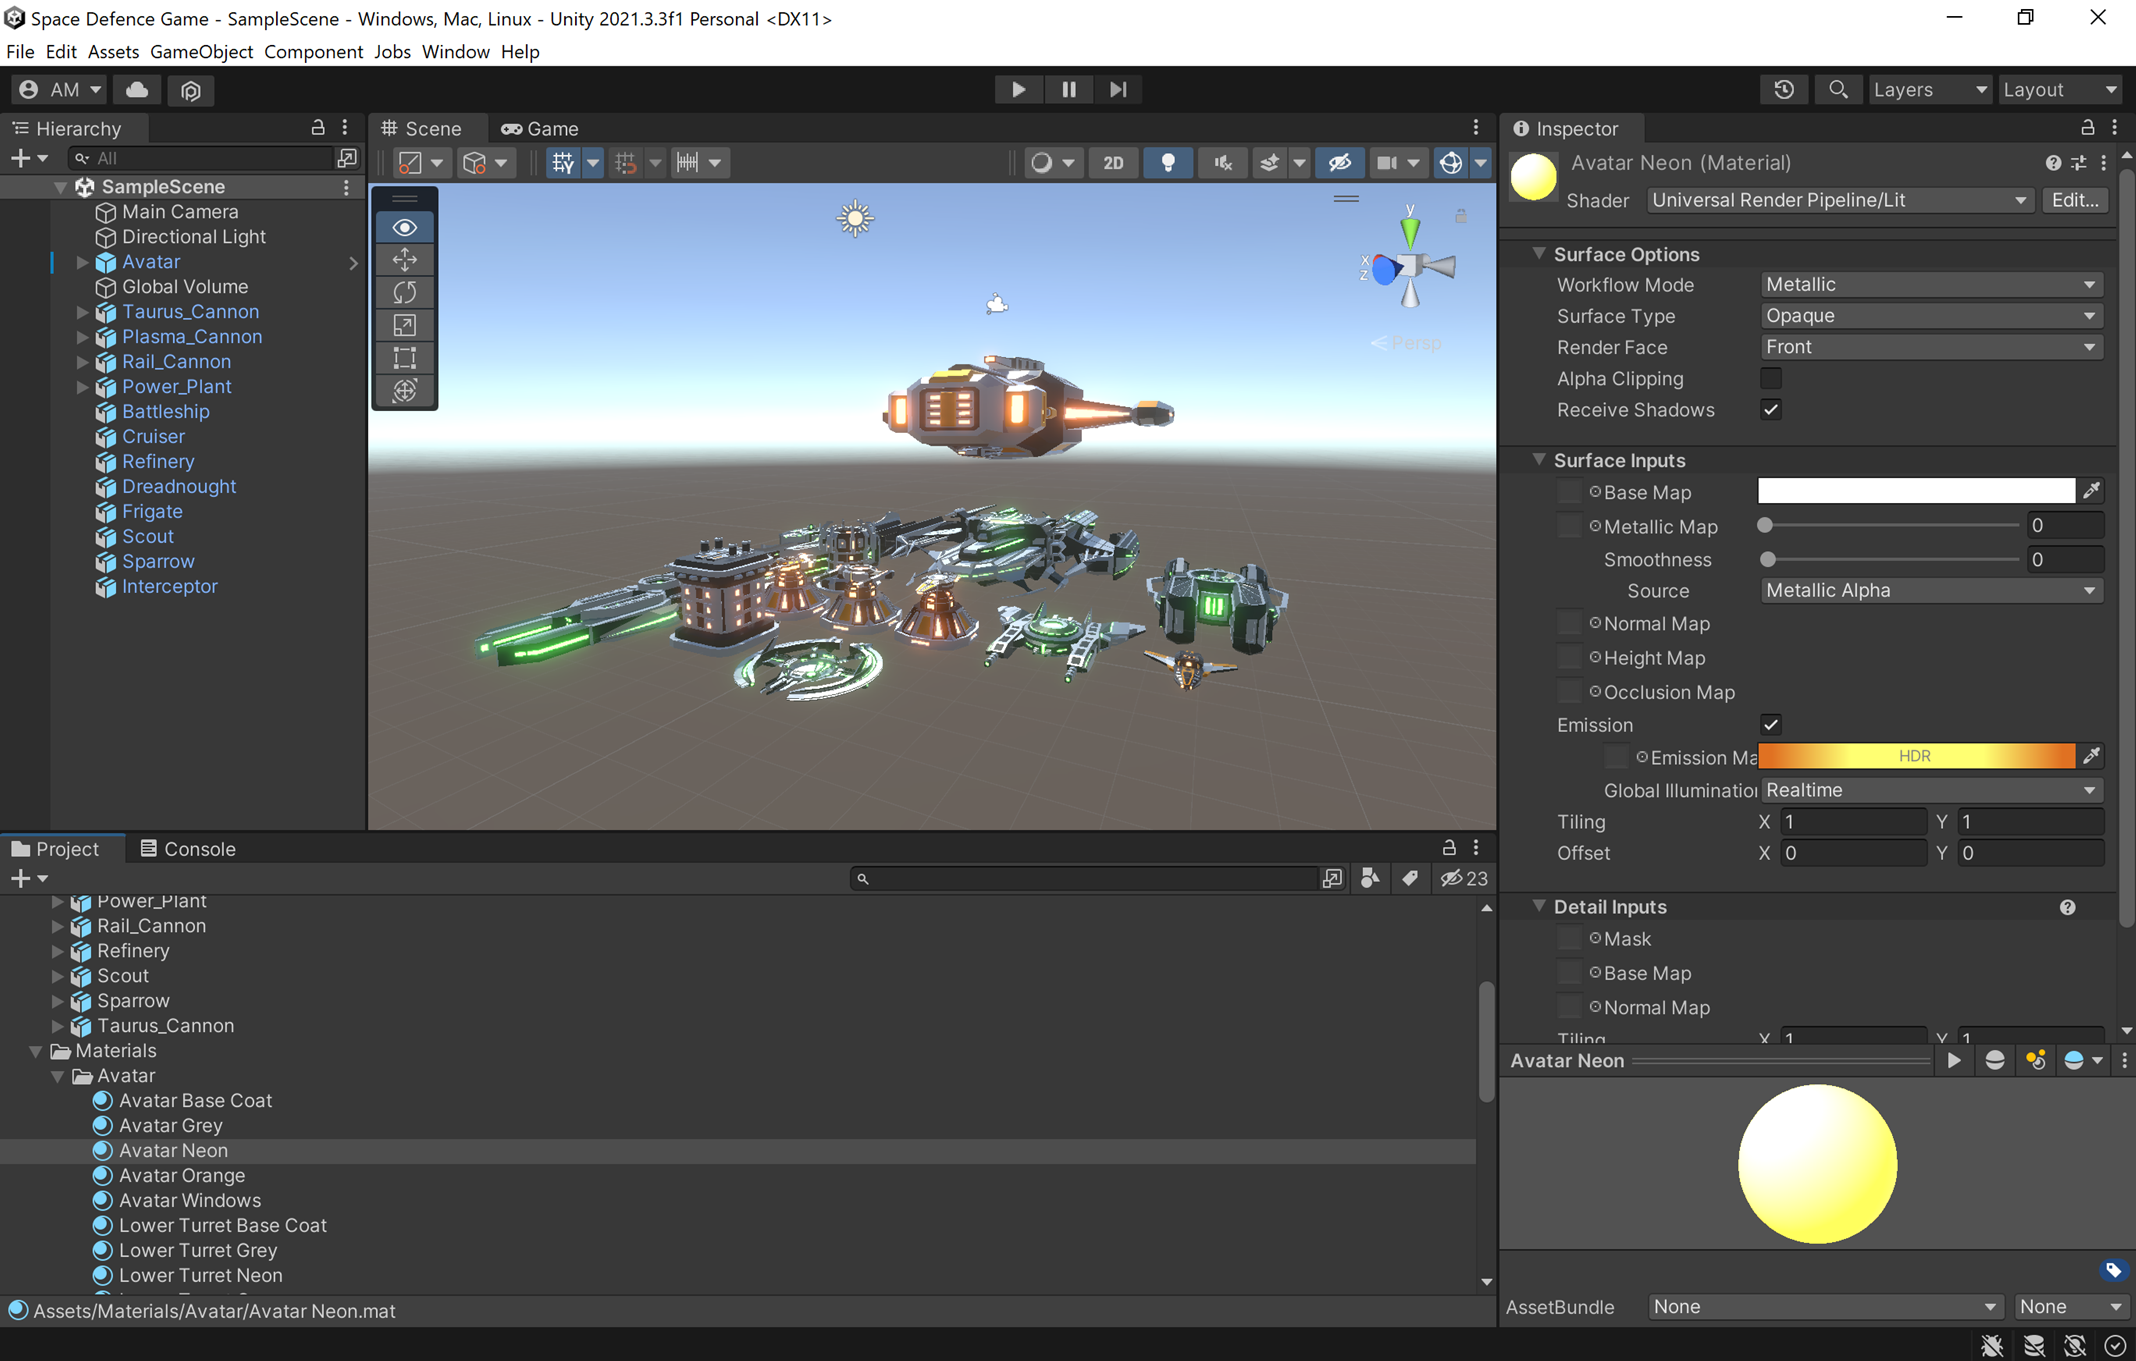
In order to keep the bloom effects of my Blender models in the transition to Unity, extra steps needed to be made. The Universal Rendering Pipeline (URP) and Post Processing packages were installed to support this. A new URP asset was created and configured. Within the project settings, the graphics were set to the URP asset, and all existing shaders were passed through the rendering pipleline converter to become default URP/Lit shaders. A global volume instance was added
to the scene, setting a global volume profile along with an emission threshold and overall level of intensity. Lastly, the main camera object was enabled with post processing, which would render the emission blooms.
I also continued to import the rest of my game assets into Unity. However, this was met with a number of hurdles. Solutions included the following:
Meshes needed to be pre-processed in Blender by splitting concave and non-planar facesin order to avoid self-intersecting polygons, which would otherwise result in parts of an object's mesh to be automatically discarded.
In the case of unknown location errors when exporting an FBX file, remove UV maps under object data properties.
For misaligned axes, go into local axes mode in object mode, rotate the object such that axes match global positioning, go into edit mode, and rotate the mesh to its (original) desired orientation.
For meshes disappearing upon importing to Unity, disable the recalculating of normals to the inside of meshes within Blender before exporting as FBX.
- - - - -
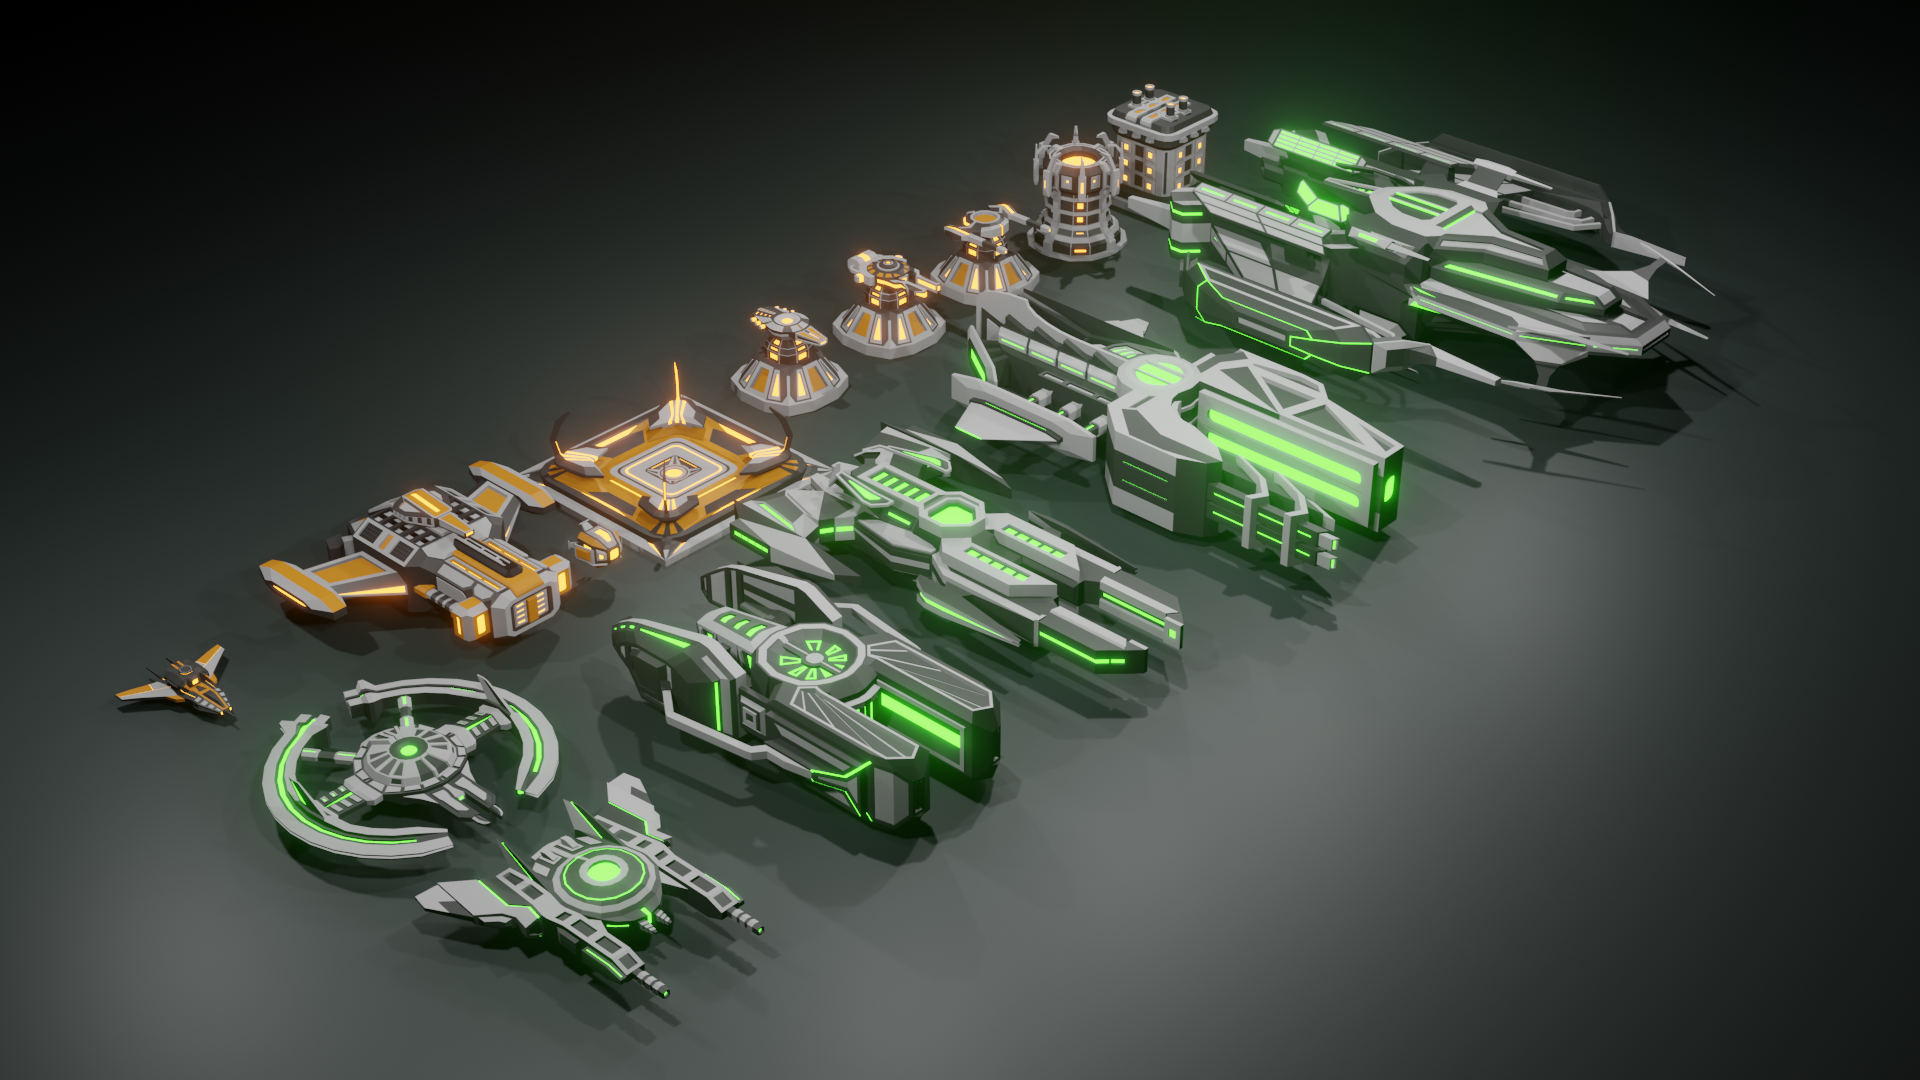
Importing Blender Models Into Unity
Game models created in Blender.
22/06/2022
In order to make my models fit for exporting into Unity, the models required splitting any concave or non-planar faces within the mesh. This would avoid any detected self-intersecting polygons, which would automatically be discarded by unity upon importing them.
After recreating and fixing my two-dimensional sprites into three-dimensional provisional models in Blender, it was time to export them to my Unity project. The first task concerned the avatar model. Within Blender, the model was repositioned to face along the Y axis. During the export process, the forward vector was set to the Z axis, and the upward vector the Y axis. The scaling was set according to FBX units.
The model was imported into the designated FBX directory, and its materials were extracted into the defined Materials folder.